
 Add Us As A Trusted Google Source
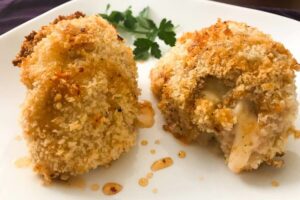
My Curated Tastes is reader-supported. When you buy through links on our site, we may earn an affiliate commission at no extra cost to you. As an Amazon Associate I earn from qualifying purchases.
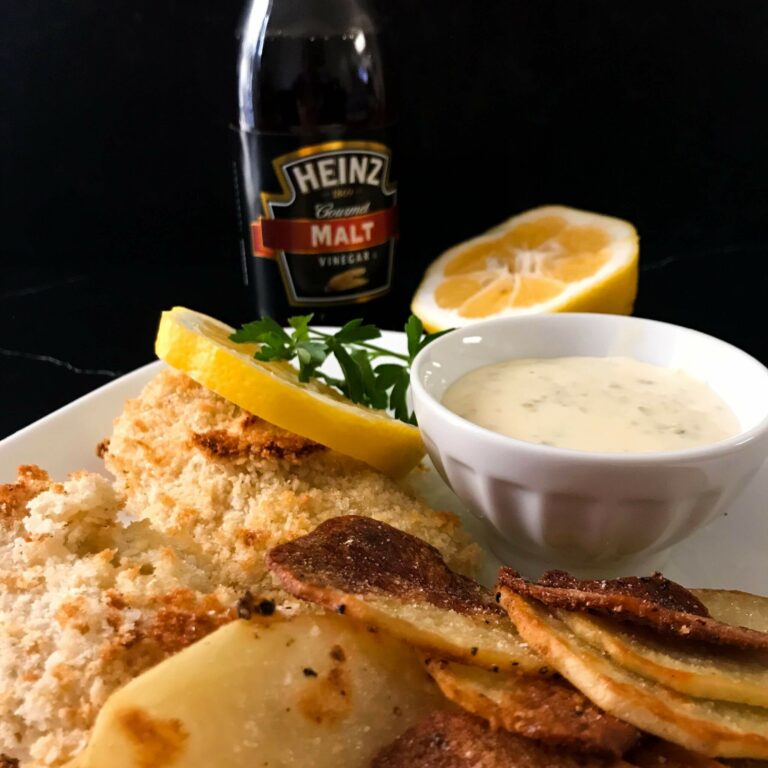
If you’ve ever craved the satisfying crunch of classic fish and chips without the guilt that comes with deep frying, you are in the right place. This Baked Fish and Garlic Chips recipe delivers everything you love about that beloved British pub classic — golden, crispy fish, tender-yet-crunchy potato chips, a zippy homemade tartar sauce — all baked in the oven, not dropped in a vat of oil. It’s the kind of dinner that feels indulgent but is actually light enough to enjoy any night of the week. And if you love lightened-up comfort food the way I do, be sure to check out my Panko Crusted Cod and my crowd-pleasing Sheet Pan Lemon Cod on Crispy Garlic Potatoes — both are weeknight heroes that hit the spot without derailing your healthy eating goals. Whether you’re feeding the family on a busy Tuesday or looking for the perfect casual centerpiece for your St. Paddy’s Day celebration, this recipe is ready to shine.
Why This Recipe Works
The secret to this recipe’s success is a trio of smart swaps that preserve all the flavor and texture of traditional fish and chips while cutting back significantly on fat and calories. First, using Wondra flour instead of a thick batter creates just a feather-light dusting on the fish — enough to help the Panko breadcrumbs adhere beautifully, but without the heavy coating you’d find at a fish fry. Second, Panko breadcrumbs are the MVP of the crunch factor: their airy, coarse texture browns up extraordinarily well in a hot oven, giving you that satisfying crispy bite without a drop of deep-fry oil. A quick spritz of cooking spray before the fish goes in is the final touch that locks in the golden color. On the chip side, slicing the potatoes to a consistent quarter-inch thickness and tossing them with just a tablespoon of olive oil and garlic powder means every slice gets crispy edges and a soft center — exactly what a proper chip should be. High-heat baking does the heavy lifting here, and the result is a complete plate that tastes far more indulgent than it really is.
The Ingredients — And Why Each One Matters
Cod Filets (2, 6 oz. each): Cod is the classic choice for fish and chips for good reason. It’s mild, slightly sweet, and firm enough to hold up through the breading and baking process without falling apart. Its lean protein profile makes it an ideal canvas for this lighter preparation.
Russet Potato (1 medium, peeled and sliced 1/4 inch): Russets are the gold standard for chips. Their high starch content helps them crisp up beautifully in the oven, while their fluffy interior stays soft and pillowy inside that crisp exterior — just like a proper chip should be.
Wondra Flour (1/2 cup): This is the secret weapon. Wondra is a fine, pre-gelatinized flour that coats food lightly and evenly without clumping or creating a thick crust. It gives the fish just enough of a surface for the egg wash and Panko to cling to without loading on extra calories.
Eggs, beaten with water (2 large): The egg wash is the glue that holds the entire breading together. Beating in a tablespoon of water thins it slightly so it coats the fish in a thin, even layer rather than a heavy, gummy shell.
Panko Breadcrumbs (1 cup): Panko is the key to that incredible crunch. Unlike regular breadcrumbs, Panko is coarser and drier, which means it absorbs less oil and crisps up much more aggressively in a hot oven. The result is a shatteringly crisp coating that rivals anything from a fryer.
Olive Oil (1 tablespoon): Just a tablespoon of good olive oil is all it takes to coat the potato slices and help them roast to a gorgeous golden brown. It also carries the garlic flavor into every chip.
Garlic Powder (1 teaspoon): This is where the ‘garlic chips’ in the name comes from. Garlic powder distributes evenly across all the potato slices and creates a savory, aromatic crust as they roast. Fresh garlic would burn at this temperature — the powder is the smarter choice here.
Kosher Salt and Freshly Ground Black Pepper: Seasoning at every stage — the flour, the egg wash, and the Panko — is what makes the difference between fish and chips that taste flat and ones that taste truly vibrant. Kosher salt’s coarser grain also adds a subtle texture to the final sprinkle over the finished dish.
Low-Fat Mayonnaise (1/4 cup): The base of the homemade tartar sauce. Using a low-fat mayo keeps the sauce creamy and rich-tasting while trimming back the calories. The generous hit of lemon juice brightens it up so much that you won’t miss the full-fat version at all.
Sweet Pickle Relish (2 tablespoons): Relish brings the classic tartar sauce signature — a sweet, briny, slightly chunky element that cuts through the richness of the fish and complements the lemon beautifully.
Lemon, quartered (1): Fresh lemon is non-negotiable. A squeeze over the just-baked fish brightens every bite and is the traditional finishing touch that makes the whole plate sing.
Malt Vinegar (optional, for serving): Malt vinegar is the traditionally Irish and British way to dress your chips, and it’s virtually calorie-free. Its sharp, tangy flavor is a perfect counterpoint to the crispy, golden potatoes. Highly recommended if you want the full pub-style experience.
Cooking Spray: A fine mist of cooking spray over the breaded fish before baking is the simple trick that helps the Panko turn genuinely golden and crunchy rather than pale and soft. Don’t skip it.
Possible Ingredient Substitutions
One of the best things about this recipe is how flexible it is. Here are some easy swaps that work well:
Cod → Haddock, Halibut, or Tilapia: Any mild, firm white fish will work here. Haddock is perhaps the most traditional British substitute. Tilapia is very budget-friendly, while halibut is a more luxurious option. Just be mindful of thickness — thinner filets may only need 15–18 minutes in the oven.
Wondra Flour → All-Purpose Flour: All-purpose flour works perfectly well as a substitute. Just use it sparingly — tap off any excess so you maintain a light coating rather than a thick crust.
Panko → Regular Breadcrumbs or Gluten-Free Panko: Regular breadcrumbs will work in a pinch but will give a denser, less crunchy result. For a gluten-free version, look for gluten-free Panko, which performs nearly as well as the original.
Russet Potato → Yukon Gold or Sweet Potato: Yukon Gold potatoes will give you a slightly creamier, buttery-tasting chip. Sweet potatoes are a fun and nutritious twist — just keep an eye on them as they can brown faster.
Olive Oil → Avocado Oil: Avocado oil has a higher smoke point and a neutral flavor, making it a great alternative for roasting the chips.
Low-Fat Mayo → Greek Yogurt: Plain non-fat Greek yogurt makes an excellent, protein-packed base for the tartar sauce. It will be tangier than mayo, so you may want to reduce the lemon juice slightly.
Sweet Pickle Relish → Dill Relish or Capers: If you prefer a less sweet tartar sauce, dill relish gives it a sharper flavor. Finely chopped capers are a more sophisticated and briny option that works beautifully.
Malt Vinegar → Apple Cider Vinegar or White Wine Vinegar: Both are slightly milder than malt vinegar but will give you that same bright, acidic finish. In a pinch, a simple squeeze of lemon juice works too.

Want to share this infographic?
How to Make Baked Fish and Garlic Chips
- To get started on this recipe, preheat the oven to 375 degrees F. Line two baking sheets with tin foil for easy cleanup. Spray both with cooking spray.
- Salt and pepper your cod pieces. Set up a traditional breading station. On a plate on in a shallow bowl, put the Wonder flour and salt and pepper it. In a shallow bowl, beat the two eggs and water and season with salt and pepper. On a third plate or shallow bowl, add the Panko and some salt and pepper. You’ll notice you are seasoning all ingredients.
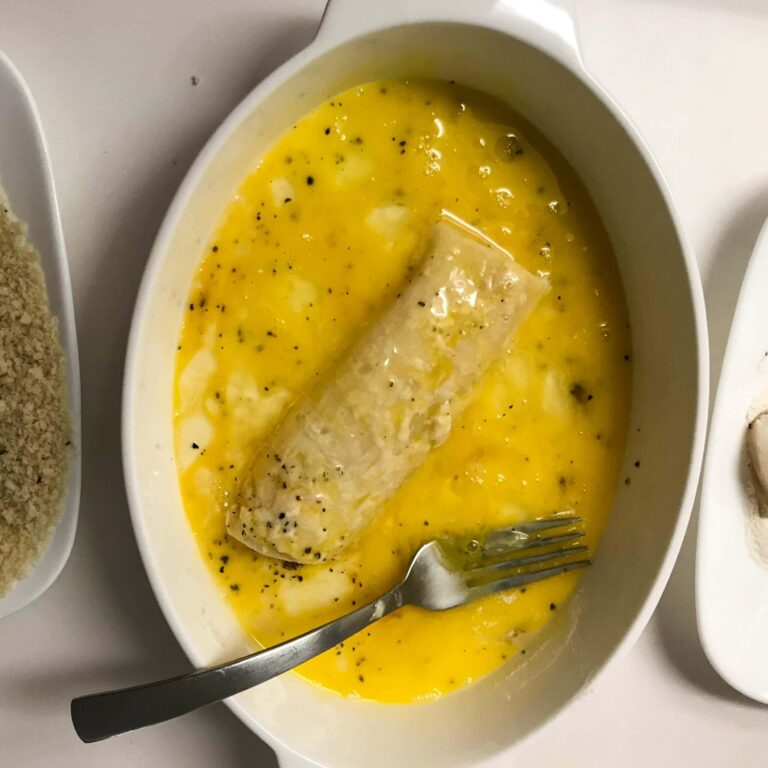
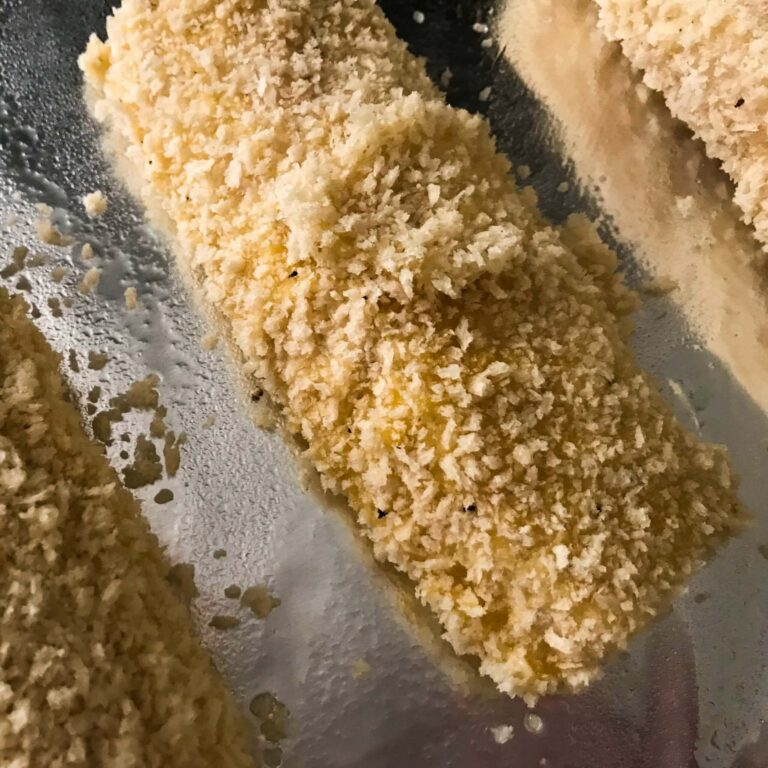
- Roll your fish fillets in the Wonder flour and tap off excess. Next, dip into the egg and roll so the entire fish filet is coated. Let the excess drip off. Roll in the Panko crumbs pressing to make sure the breadcrumbs still to the fish. Place the prepared fillets on one of the baking sheets. Put to the side.
- Take your peeled and cut potatoes and put in a bowl. Add the oil, garlic and a pinch of salt and some freshly ground black pepper to taste. Toss so all the potatoes are coating in the oil and garlic.
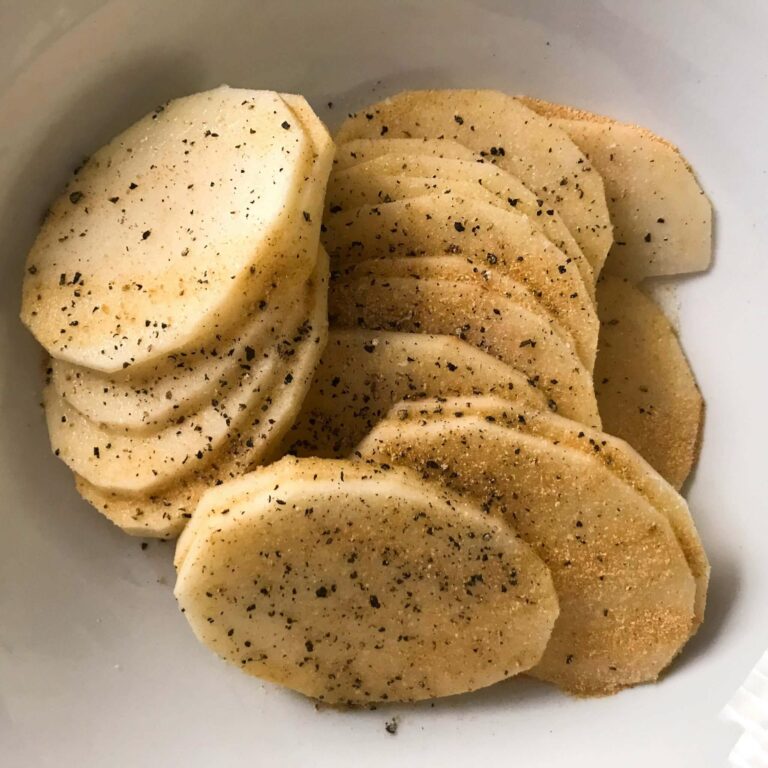
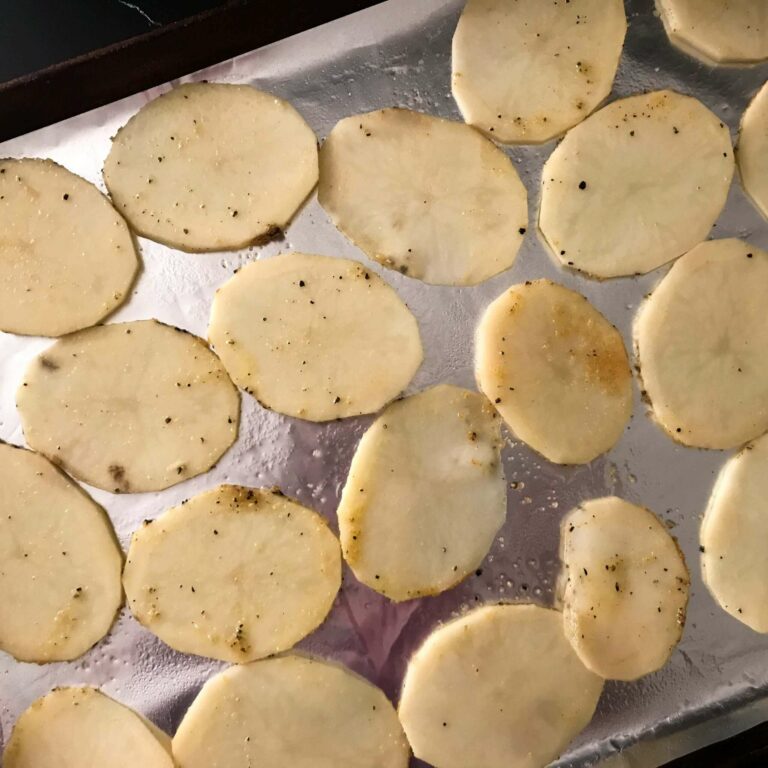
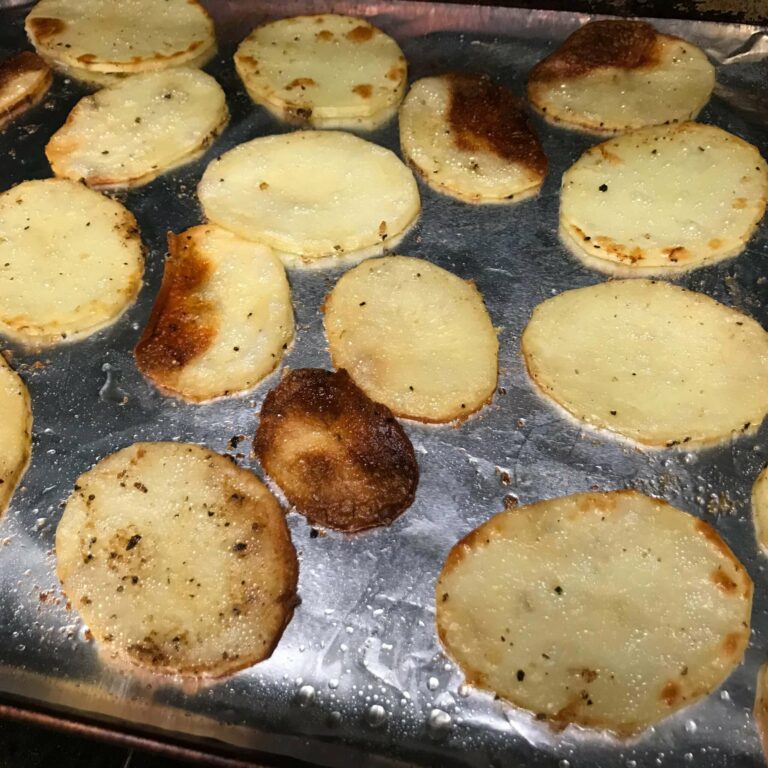
- Place individual slices down on the second baking sheet…they should not overlap. Place in the oven for 30-35 minutes until brown and crispy. Turn them over about half way through the cook time.
- The fish will take about 20-25 minutes so after the potatoes have been in the oven for 10 minutes, put the tray of fish in the oven. Spray the fish first with cooking spray. This will help them brown.
- If you want additional browning on the fish , place under the broiler for 2-3 minutes at the end of the cooking time to get golden.
- While the fish and potatoes are baking, make the tartar sauce by mixing the mayo, relish and juice of 1-2 lemon wedges in a small bowl. Put in small serving bowls and put to the side.

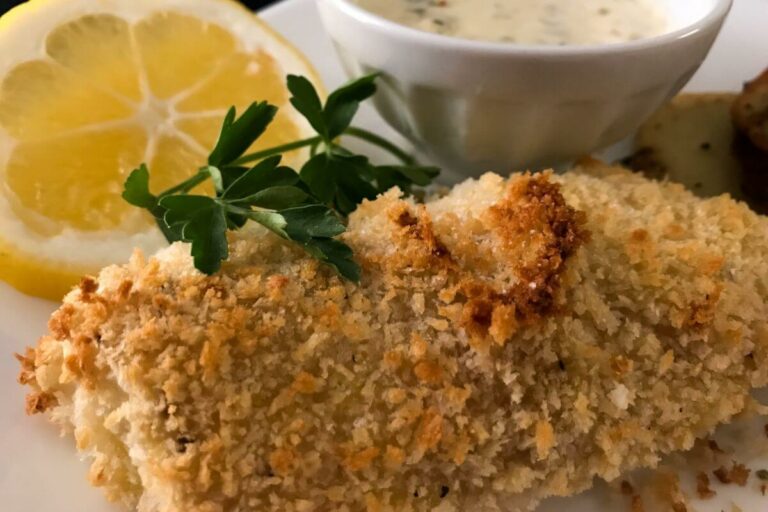
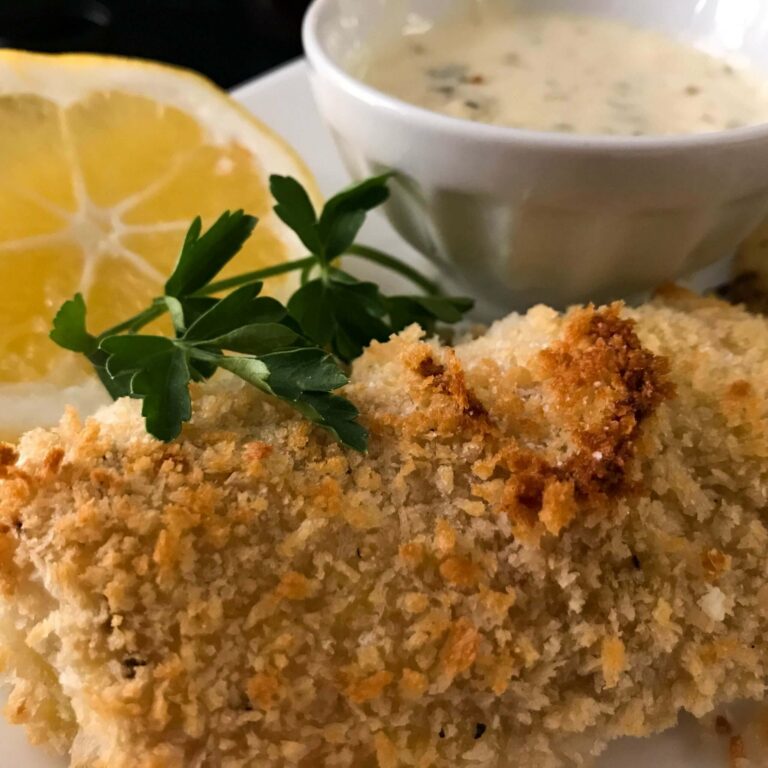
- Remove the fish and chips from the oven and sprinkle with salt. Evenly distribute the potato chips between two plates and add one filet to each plate. Serve with a lemon wedge, the homemade tartar sauce and malt vinegar on the side. Enjoy!
How to Store and Reheat Leftovers
Baked fish and chips are at their absolute best fresh out of the oven, but if you do have leftovers, here’s how to handle them:
Storing: Allow the fish and chips to cool completely before storing. Keep the fish and the potato chips in separate airtight containers in the refrigerator. They will keep well for up to 2 days. Avoid wrapping them tightly in plastic wrap while still warm, as the steam will make the coating soggy.
Reheating the Fish: The oven is your best friend here. Place the fish on a foil-lined baking sheet and reheat at 375°F for 10–12 minutes until heated through and the crust is crispy again. Avoid the microwave — it will steam the coating and turn it rubbery.
Reheating the Chips: Spread the potato slices in a single layer on a baking sheet and reheat at 400°F for 8–10 minutes, flipping once halfway through. This higher temperature will help re-crisp them nicely. An air fryer set to 375°F for 5–6 minutes is even better if you have one — it practically brings them back to just-baked perfection.
Can You Freeze It? The fish can be frozen after baking, though the texture of the Panko coating will soften somewhat after thawing and reheating. If you do freeze it, wrap filets individually in plastic wrap, then place in a zip-top freezer bag for up to 1 month. Reheat from frozen in a 375°F oven for 20–25 minutes. The potato chips do not freeze well and are best enjoyed fresh.
FAQ Section for Baked Fish and Garlic Chips
The total cooking time is 35 minutes. Bake the potato chips for 30-35 minutes at 375°F, flipping halfway through. Add the fish to the oven after 10 minutes and bake for 20-25 minutes. This timing ensures both components finish simultaneously and achieve optimal crispiness.
Bake at 375°F for both the fish and chips. This moderate-high temperature ensures the fish cooks through while the panko coating becomes golden and crispy, and the potato chips get perfectly browned without burning.
Yes, but thaw it completely first. Pat the cod fillets dry with paper towels before breading to remove excess moisture, which helps the coating adhere better and prevents sogginess during baking.
Cod is ideal due to its mild flavor and firm, flaky texture. Alternatives include haddock, pollock, halibut, or tilapia. Choose thick fillets (6 oz portions) that hold up well to breading and baking.
Use panko breadcrumbs instead of regular breadcrumbs for maximum crunch. Spray the breaded fish with cooking spray before baking to promote browning. For extra crispiness, place under the broiler for 2-3 minutes at the end. Ensure potato slices don’t overlap on the baking sheet.
This baked version contains significantly fewer calories than traditional deep-fried fish and chips—approximately 400-500 calories per serving versus 800-1200 for fried versions. The reduction comes from using minimal oil and baking instead of deep frying.
Yes, considerably. Baking reduces fat content by 60-70% compared to deep frying, eliminates trans fats, and preserves more of the fish’s natural nutrients like omega-3 fatty acids. This version uses light mayo for the tartar sauce and minimal oil for the chips.
Wondra is an instant flour that’s finer than all-purpose flour, creating a lighter coating that becomes exceptionally crispy when baked. You can substitute regular all-purpose flour, though the coating will be slightly heavier. For a gluten-free option, use rice flour or gluten-free all-purpose flour.
Yes, this recipe is already WW-friendly. Further reduce points by using egg whites instead of whole eggs, reducing the oil to 1-2 teaspoons, and using fat-free mayo. The panko and baking method keep it lower in points than traditional fried versions.
Yes, sweet potatoes work beautifully and add nutritional value with extra fiber and vitamin A. They may caramelize slightly more during baking, so watch them closely after 25 minutes to prevent burning.
Crushed cornflakes, regular breadcrumbs, or crushed crackers work as substitutes. Panko is preferred for its superior crunch and lighter texture. For gluten-free, use gluten-free panko or crushed rice cereal.
No, malt vinegar is traditional but optional. Alternatives include white vinegar, apple cider vinegar, or fresh lemon juice. Some prefer no vinegar at all and just use the homemade tartar sauce and lemon wedges.
Slice potatoes about 1/4 inch thick—thick enough to have texture and a fluffy interior, but thin enough to crisp up properly in the oven. A mandoline slicer ensures uniform thickness for even cooking.
The cooking spray helps the panko coating brown and crisp up in the oven, mimicking the effect of deep frying without the excess oil. Without it, the breading may remain pale and less crunchy.
Yes, seasoning the flour, egg wash, and panko separately ensures the fish is well-flavored throughout every layer. This prevents bland fish with only a seasoned coating.
Bread the fish up to 2 hours ahead and refrigerate uncovered. Cut and season the potatoes up to 1 hour ahead, storing them in water to prevent browning (drain and pat dry before tossing with oil). For best results, bake just before serving.
Sogginess occurs from excess moisture. Ensure cod is thoroughly patted dry before breading. Don’t skip the flour layer, which acts as a moisture barrier. Spray with cooking spray before baking, and don’t overcrowd the pan, which traps steam. If needed, finish under the broiler for 2-3 minutes.
Yes, air fry at 400°F for 10-12 minutes for the fish and 15-18 minutes for the chips, shaking halfway through. The air fryer creates even crispier results with less oil.
British chips are thicker-cut potatoes (like steak fries), while American fries are thinner. This recipe uses 1/4-inch slices for a lighter, crispier chip that’s between the two styles.
Keep them in a 200°F oven on a wire rack (not a solid pan) until serving. The rack allows air circulation, preventing condensation. Serve within 15-20 minutes for best texture.
Yes, double or triple the recipe and use multiple baking sheets. Rotate their positions in the oven halfway through cooking. Consider baking in batches if needed, keeping finished portions warm on wire racks in a low oven.
Reheat in a 375°F oven for 10-12 minutes on a wire rack to restore crispiness. Avoid microwaving, which makes the coating soggy. An air fryer also works well at 350°F for 5-7 minutes.
For this recipe, yes. Garlic powder distributes evenly and won’t burn during the long baking time. Fresh garlic can scorch and turn bitter at 375°F. If using fresh garlic, add it during the last 10 minutes of baking.
This is an Americanized, healthier adaptation. Traditional British fish and chips uses beer batter and deep frying. This version maintains the spirit—crispy fish with chips and malt vinegar—while using healthier baking methods.
Malt vinegar is a British tradition that adds tangy acidity to cut through the richness of fried food. It’s made from malted barley and has a distinctive, slightly sweet flavor that complements white fish perfectly
How and When to Serve This Dish
This Baked Fish and Garlic Chips is one of those versatile dinners that fits effortlessly into all kinds of occasions. Here’s when it really shines:
St. Patrick’s Day — The Perfect Casual Celebration Meal: Fish and chips is as Irish as it gets, and this lighter baked version is the ideal centerpiece for a fun, relaxed St. Paddy’s Day dinner at home. Skip the heavy pub fare and serve this instead — it has all the spirit of the holiday without leaving you feeling overstuffed. Set the table with malt vinegar, lemon wedges, and a big bowl of the homemade tartar sauce, and you’ve got a feast that feels festive and fun. Pair it with a crisp green salad and, of course, a pint (or a sparkling water with lime if you’re keeping it light!). It’s casual, crowd-pleasing, and perfectly on-theme for March 17th.
Easy Weeknight Dinner: With a 15-minute prep time and just 35 minutes in the oven, this comes together quickly enough for a busy weeknight. It’s especially great for families, since both the fish and chips appeal to kids and adults alike. Serve it straight from the baking sheet onto plates for minimal cleanup.
Casual Friday Night Dinner: There’s something about fish and chips that just feels like a Friday night. This baked version lets you indulge in that end-of-week treat without any of the Friday night remorse. Put on a good show, grab your malt vinegar, and dig in.
Lent-Friendly Fridays: For those observing Lent, this is an absolutely delicious way to keep the Friday fish tradition without getting bored. It’s flavorful, satisfying, and far more exciting than a plain baked filet.
Serving Presentation Tips:
Plate it pub-style by fanning the potato chips across one side of the plate with the fish filet nestled alongside. Add a wedge of lemon, a small ramekin of tartar sauce, and a small bottle of malt vinegar on the table. A sprinkle of fresh chopped parsley over the chips adds a pop of color and a fresh herbal note that elevates the whole presentation. Newspaper-printed parchment paper lining the plate or in a casual basket is a fun, thematic touch for St. Patrick’s Day or any time you want a pub-night vibe at home.
Did you enjoy this meal? If so, please leave a comment and rating below. I’d love to hear from you.
If you like fish and want to try some lightened up fish dishes, be sure to explore these recipes. They are baked with flavor, but I’ve got way back on the calories and have employed some healthier ways of preparing food. Let me know what you think.
Salmon with Bourbon and Peaches
Lime, Ginger and Blackberry Salmon Bowl
Sheet Pan Lemon Cod on Crispy Garlic Potatoes with Asparagus
Baked Fish and Garlic Chips
Nutritional information is only an estimate. The accuracy of the nutritional information for any recipe on this site is not guaranteed.
Ingredients
- 2 6 Oz. Cod filets
- 1 Medium russet potato, peeled and cut into 1/4 inch slices
- 1/2 Cup Wondra Flour
- 2 Large eggs, beaten with a tablespoon of water
- 1 Cup Panko breadcrumbs
- 1 Tbsp. Olive oil
- 1 Tsp. Garlic powder
- Kosher salt and freshly ground black pepper to taste
- 1/4 Cup Low fat mayonnaise
- 2 Tbsp. Sweet pickle relish
- 1 Lemon, cut into quarters
- Malt Vinegar, for serving (optional)
- Cooking spray
Instructions
- Preheat oven to 375 degrees. Line two baking sheet with tin foil for easy cleanup. Spray both with cooking spray.
- Salt and pepper your cod pieces. Set up a traditional breading station. On a plate, put the Wonder flour and salt and pepper it. In a shallow bowl, beat the two eggs and water and season with salt and pepper. On a third plate, add the Panko and some salt and pepper. You’ll notice you are seasoning all ingredients.
- Roll your fish filets in the Wonder flour and tap off excess. Next, dip into the egg and roll so the entire fish filet is coated. Let the excess drip off. Roll in the Panko crumbs pressing to make sure the breadcrumbs still to the fish. Place the prepared filets on one of the baking sheets. Put to the side.
- Take your peeled and cut potatoes and put in a bowl. Add the oil, garlic and a pinch of salt and some freshly ground black pepper to taste. Toss so all the potatoes are coating in the oil and garlic. Place individual slices down on the second baking sheet…they should not overlap. Place in the oven for 30-35 minutes until brown and crispy. Turn them over about half way through the cook time.
- The fish will take about 20-25 minutes so after the potatoes have been in the oven for 10 minutes, put the tray of fish in the oven. Spray the fish first with cooking spray. This will help them brown.
- If you want additional browning on the fish , place under the broiler for 2-3 minutes at the end of the cooking time to get golden.
- While the fish and potatoes are baking, make the tartar sauce by mixing the mayo, relish and juice of 1-2 lemon wedges in a small bowl. Put in small serving bowls and put to the side.
- Remove the fish and chips from the oven and sprinkle with salt. Evenly distribute the potato chips between two plates and add one filet to each plate. Serve with a lemon wedge, the homemade tartar sauce and Malt Vinegar on the side. Enjoy!
Explore More with AI
Diane Ringler
Recipe Developer
With over 10 years of restaurant experience, Diane has been cooking and developing recipes for over five years, focusing on real-food meals for two that are Weight Watchers-friendly and high in protein. A longtime WW member herself, she brings firsthand experience to every recipe — not just culinary technique, but the practical knowledge of someone who has navigated points, portions, and satisfaction for years. Her recipe for Lollipop Lamb Chops with Pistachio Pesto was selected as a KitchenAid contest winner and published in Taste of Home's "Innovate Your Plate" bookazine. She has developed recipes and created content for brands including Eggland's Best, Sprouts Market, ZenB Pasta, Flannery Beef, The Honey Jar and Marukan Vinegar. She has been cooking for two for 10 years and her recipes focus on well balanced meals that are healthy, protein-focused meals perfectly proportioned for two servings. Based in Southern California she loves fresh, seasonal produce and proteins that nourish the body and soul.


