These tarts are best served fresh within 2 hours of baking. The puff pastry loses its crispness and the bottom becomes soggy if stored longer. For advance preparation, you can prep the cream cheese filling and berry mixture up to 24 hours ahead and store them separately in the refrigerator. Assemble and bake just before serving for optimal texture.
Freezing baked tarts is not recommended as they become soggy when thawed. However, you can freeze unbaked assembled tarts for up to 1 month. Place them on a baking sheet, freeze until solid, then transfer to a freezer bag. Bake directly from frozen, adding 5-7 minutes to the baking time.
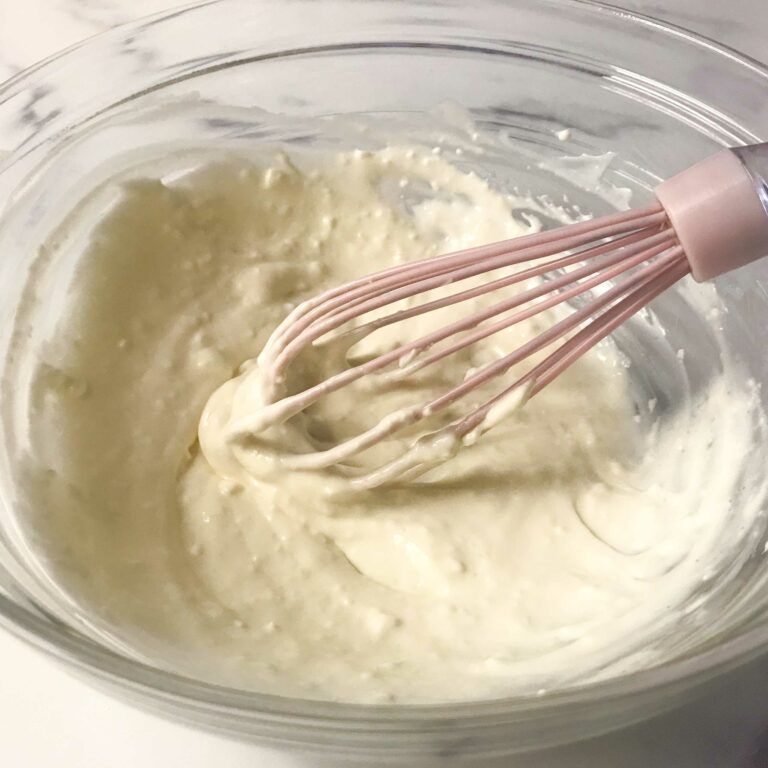
You can substitute mascarpone cheese for a richer, sweeter flavor, or use ricotta cheese (drain excess liquid first) for a lighter option. Greek yogurt cream cheese also works well. Each substitute will slightly alter the flavor and texture but maintains the creamy base needed for these tarts.
Yes, but thaw and drain them thoroughly first. Pat frozen raspberries dry with paper towels to remove excess moisture, which can make the pastry soggy. You may need to reduce the cornstarch to 1 teaspoon since frozen berries release more liquid than fresh ones.
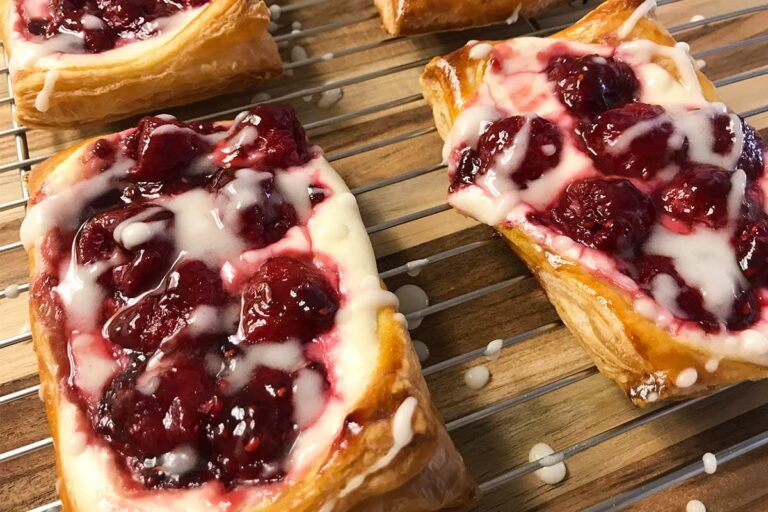
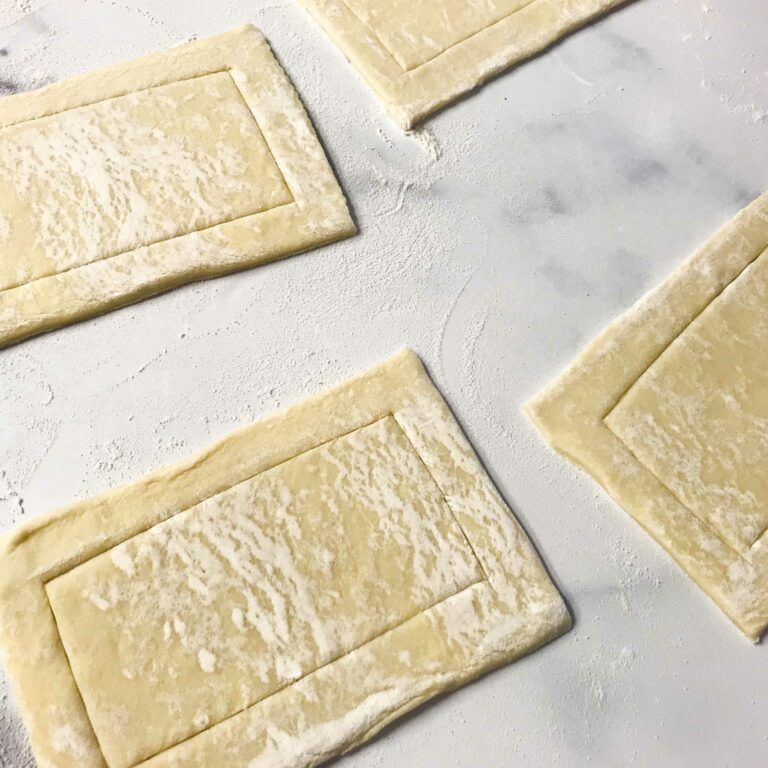
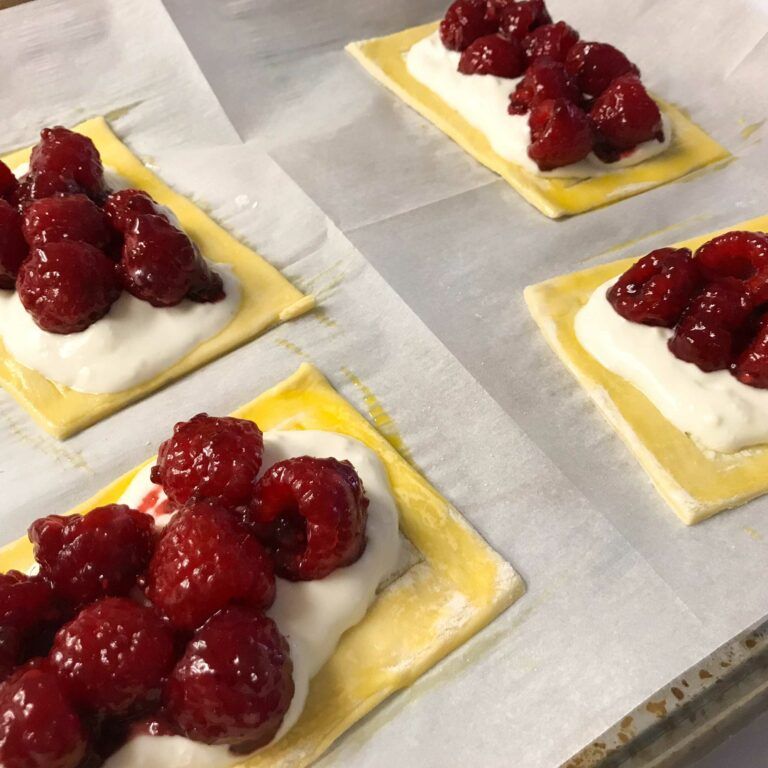
Score and dock (prick with a fork) the center of each pastry square to prevent excessive puffing. Bake at the full 400°F temperature to ensure the bottom crisps properly. The cornstarch in the berry mixture also helps absorb excess liquid. Most importantly, serve within 2 hours of baking.
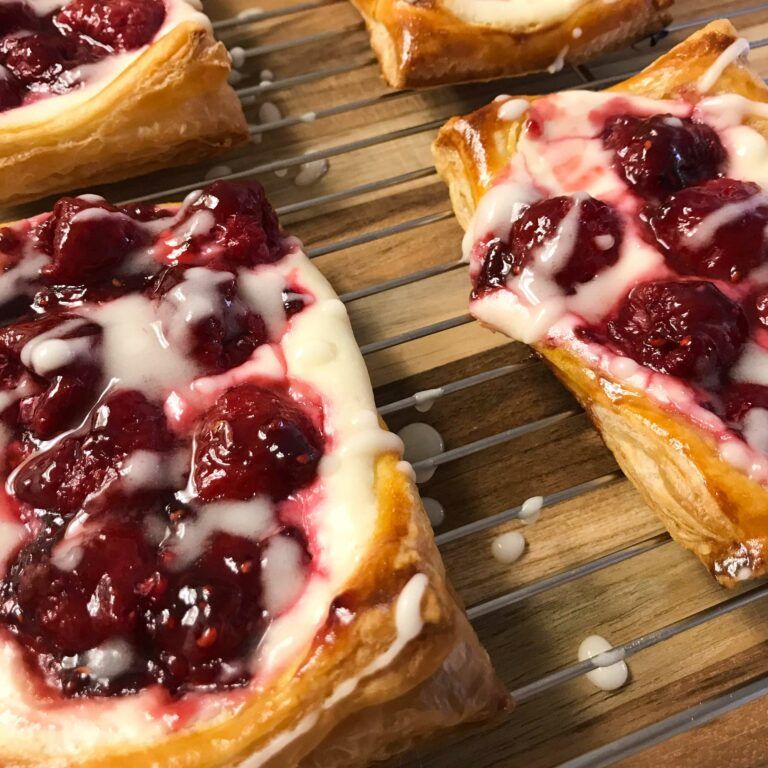
Blackberries, blueberries, strawberries (sliced), or mixed berries all work beautifully. You can also try peaches, cherries, or apricots. Match the jam flavor to your fruit choice, and adjust cornstarch to 1-2 teaspoons depending on the fruit’s moisture content.
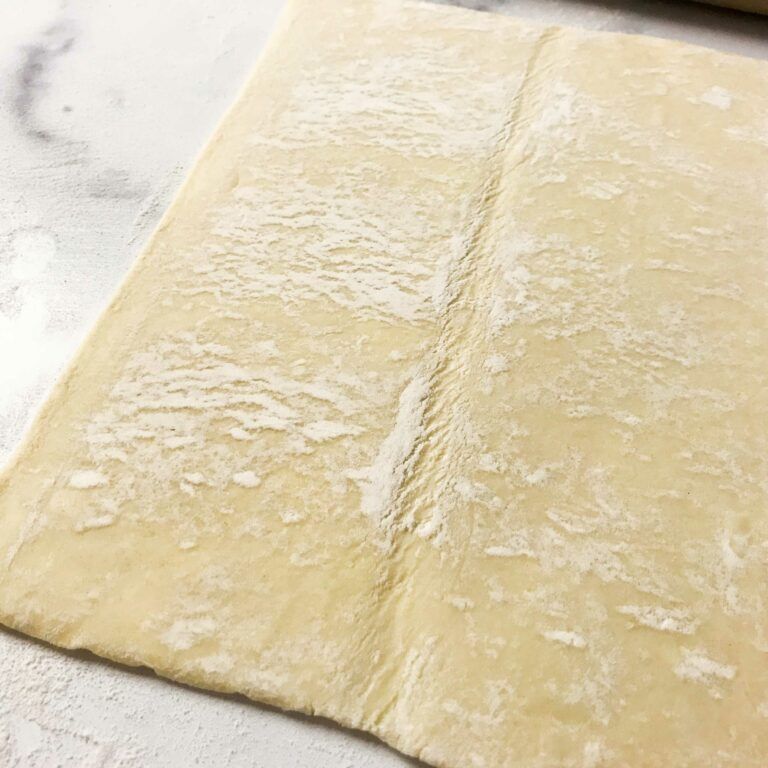
Common causes include: pastry wasn’t cold enough before baking, the oven temperature was too low, you pressed the layers together when rolling, or the pastry was past its expiration date. Always keep puff pastry cold, work quickly, and ensure your oven is fully preheated to 400°F.
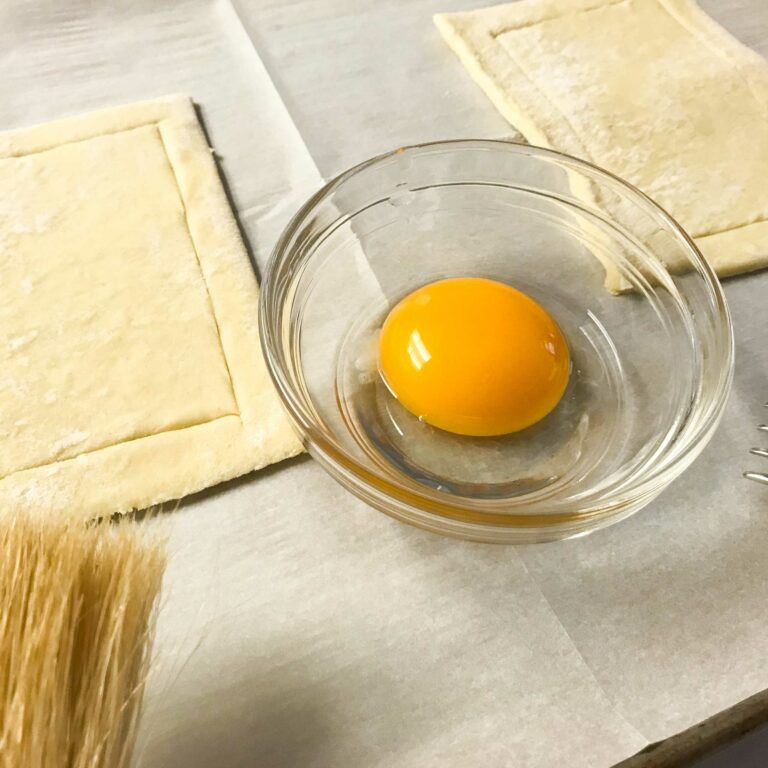
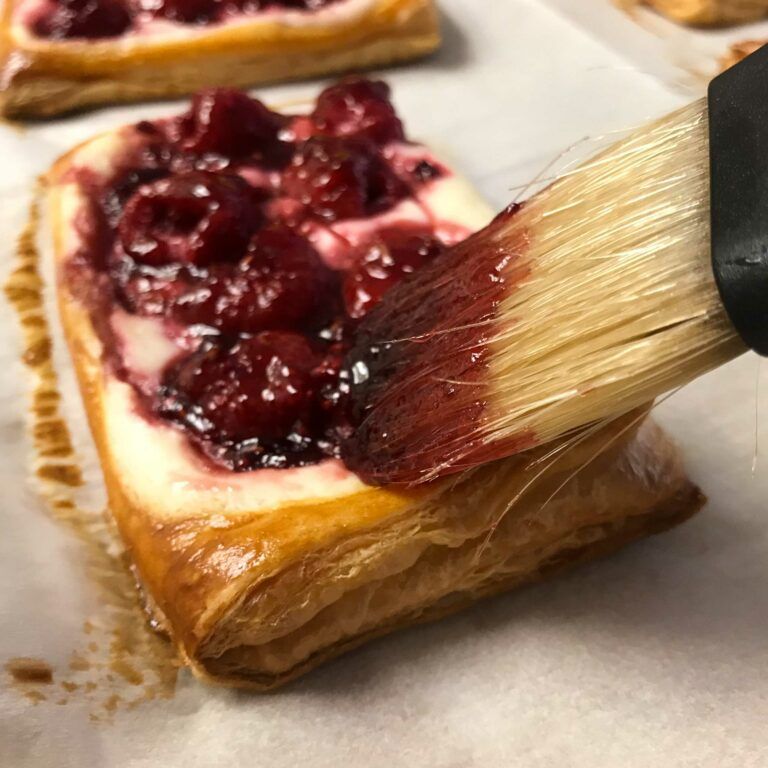
The egg yolk wash is optional but highly recommended for golden, shiny edges. For an egg-free alternative, brush the borders with milk or melted butter. The cream cheese filling contains no eggs, so that portion is already egg-free.
Absolutely! This same method works perfectly for savory variations. Replace the cream cheese mixture with goat cheese, ricotta, or herb cream cheese, and top with vegetables like tomatoes, zucchini, or caramelized onions. Skip the icing and instead finish with fresh herbs, balsamic reduction, or a drizzle of olive oil.
Reheat in a 350°F oven for 5-7 minutes to restore crispness—never use a microwave, which makes pastry rubbery. Place tarts on a wire rack set over a baking sheet so air circulates underneath. The tarts won’t be quite as crisp as fresh but will be far better than room temperature or microwaved.
Yes! Cut the puff pastry into 2-inch squares instead of rectangles. Reduce baking time to 12-15 minutes. Use about 1 teaspoon of filling per mini tart. This recipe will yield approximately 16-20 mini tarts, perfect for brunch buffets or appetizer spreads.
Scoring creates a deliberate weak point in the pastry. When heated, the butter in puff pastry creates steam that makes layers rise. The scored border allows maximum rise at the edges while the docked center stays relatively flat, creating the classic tart shape with raised borders to contain the filling.
Definitely! Homemade puff pastry will yield even better flavor and flakiness. You’ll need approximately 8 ounces of pastry rolled to about 1/8-inch thickness. The technique remains identical. Homemade pastry may puff slightly higher, so watch baking time carefully.
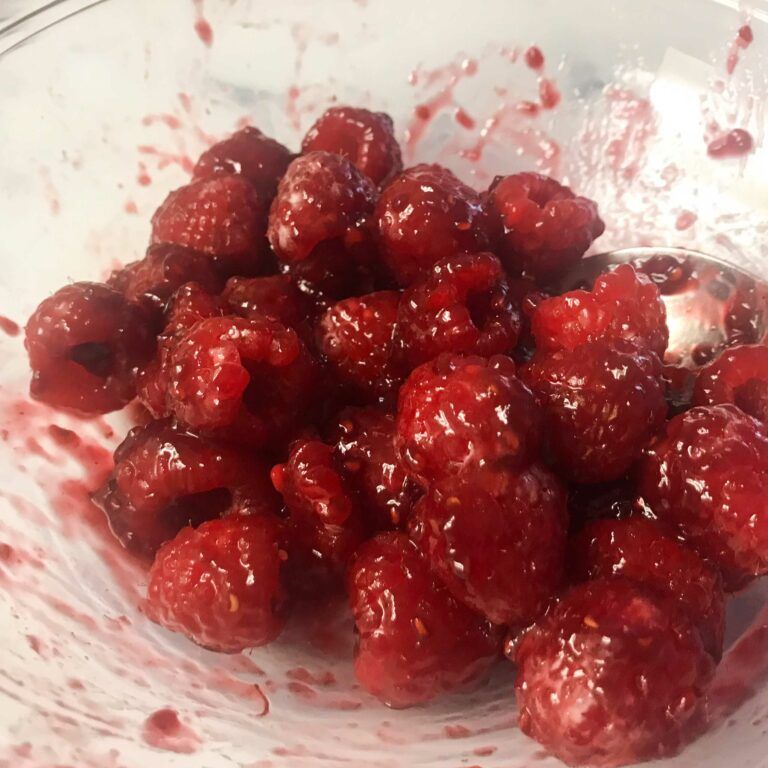
Cornstarch is a crucial thickening agent that absorbs excess juice released from the berries during baking. Without it, the tarts become soggy and the filling runs. It creates a light gel that holds the berries in place while maintaining their fresh flavor and appearance.
For dairy-free: use vegan cream cheese (Kite Hill or Miyoko’s work well) and ensure your puff pastry is dairy-free (Pepperidge Farm brand is). For the egg wash, use plant milk. The taste and texture will be slightly different but still delicious. Most store-bought puff pastry is accidentally vegan, made with vegetable shortening rather than butter.
Pepperidge Farm is widely available and reliably produces good results. For a step up, look for all-butter puff pastry brands like Dufour or Trader Joe’s all-butter variety. European-style all-butter pastry creates superior flavor and flakiness compared to brands made with vegetable shortening.
 Add Us As A Trusted Google Source


